Chinese (Simplified)

English

German

Korean

Spanish

 10 Dec, 2025
 Industry News Design & Manufacturing
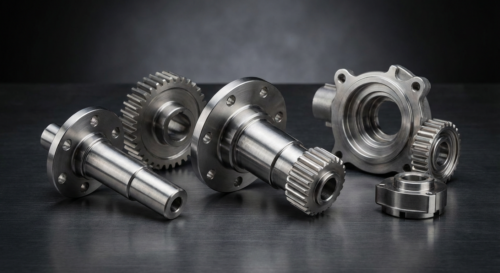
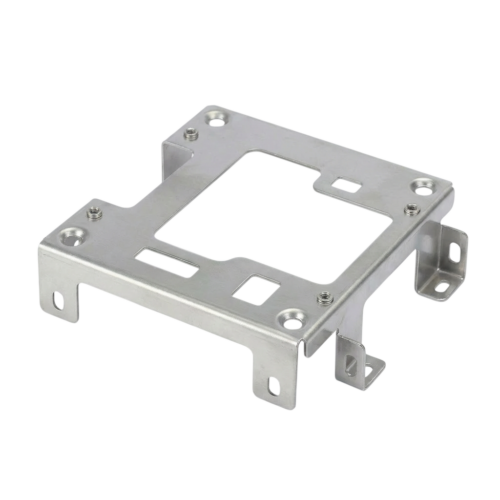
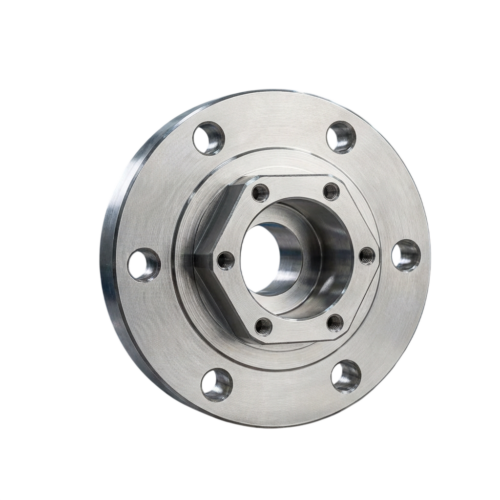
As a CNC machining solution provider with years of experience in precision manufacturing, we've seen just about every defect that can occur on the shop floor. The truth is, machining defects don't just waste material and time—they can damage your reputation and impact your bottom line. But here's the good news: most common defects are entirely preventable with the right knowledge and practices.
In this article, we'll walk you through the five most common machining defects we encounter, what causes them, and practical strategies to eliminate them from your production process. Whether you're running a small job shop or managing large-volume manufacturing, these insights will help you maintain the highest quality standards.
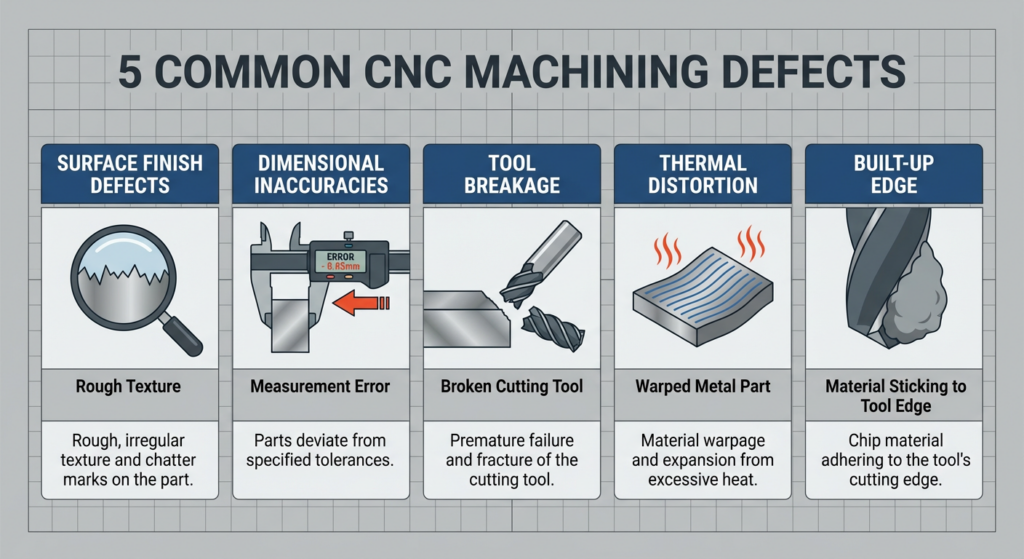
Before we dive deep into each defect, here's a quick overview of what we're dealing with:
Now, let's explore each one in detail.
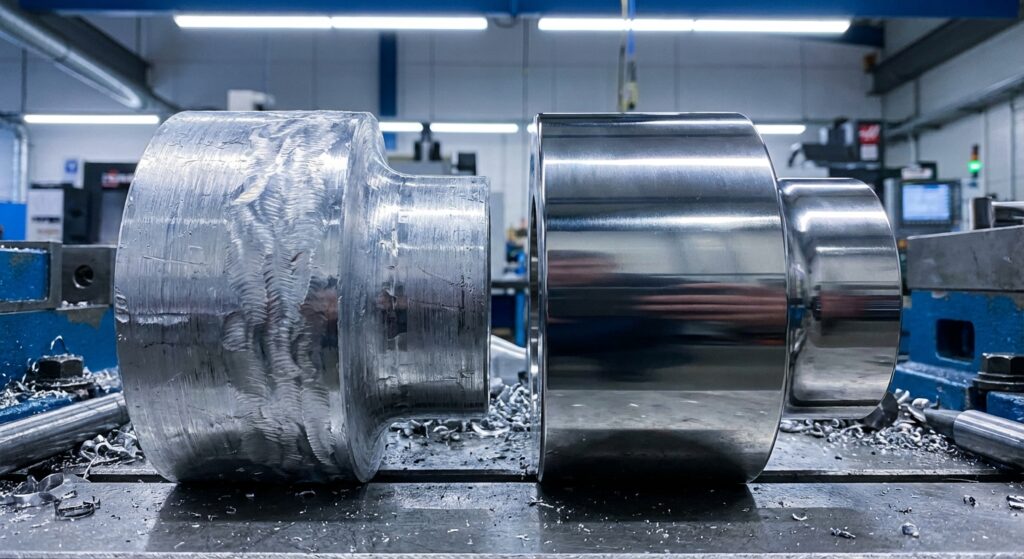
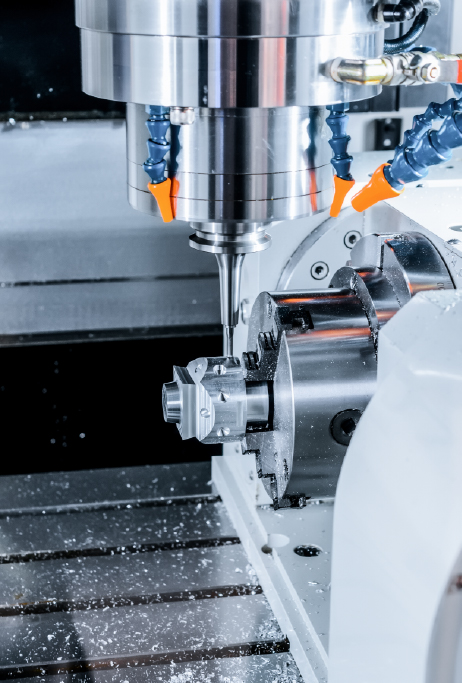
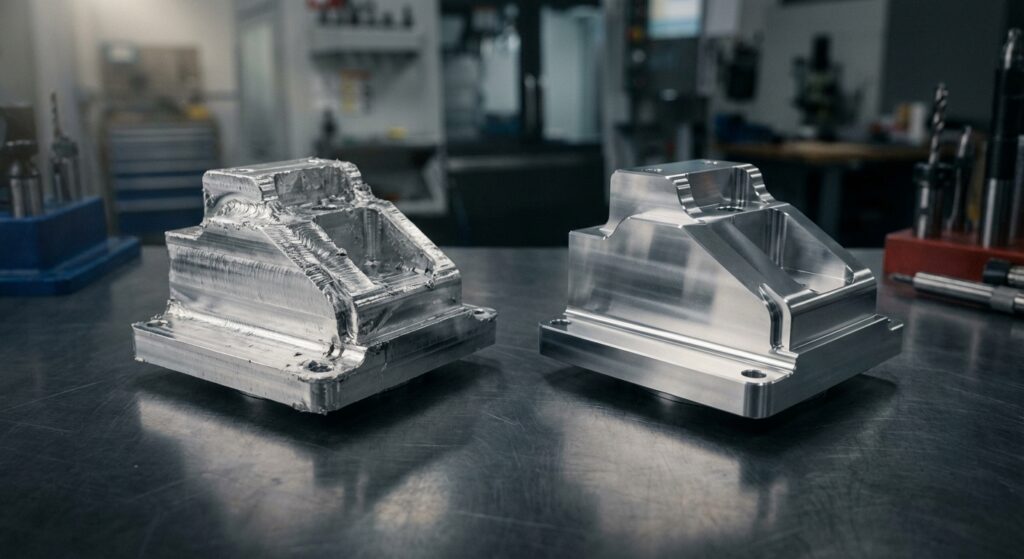
Surface finish defects are probably the most visible and frustrating problems we encounter. When a customer receives a part with poor surface quality, it's the first thing they notice. Poor surface finish typically stems from several sources: incorrect cutting speeds, worn cutting tools, inadequate coolant flow, spindle vibration, or improper feed rates.
The most common symptom is chatter—those telltale ripple marks or waves on the machined surface. Chatter occurs when there's excessive vibration between the tool and the workpiece, causing the tool to bounce rather than cut smoothly.
Optimize Your Cutting Parameters
The foundation of good surface finish is using the right speeds and feeds for your specific material and tool combination. We recommend consulting your tool manufacturer's documentation and creating a reference chart for your most common materials. For aluminum, you typically want higher speeds (600-1200 SFM) with moderate feeds. Stainless steel demands lower speeds (150-300 SFM) to prevent work hardening.
Invest in Tool Quality and Maintenance
This might sound obvious, but we see many shops trying to save money by using dull tools or tools past their prime. A sharp tool makes all the difference. Implement a tool inspection routine—replace or resharpen tools before they become completely worn. We recommend checking tools every 2-4 hours of cutting time for high-volume runs.
Reduce Vibration Through Rigidity
Vibration is the enemy of surface finish. Ensure your machine tool is properly maintained with no worn spindle bearings or loose components. Check your work-holding setup—is the part firmly secured? Are you using the shortest possible tool overhang? Sometimes, even a seemingly minor adjustment in setup can dramatically improve surface quality.
Maintain Coolant Systems
Fresh, clean coolant with proper concentration is crucial. Dirty or degraded coolant causes poor heat removal and lubrication, directly impacting surface finish. We recommend monitoring and replacing coolant regularly—at least every 3-6 months depending on usage intensity.
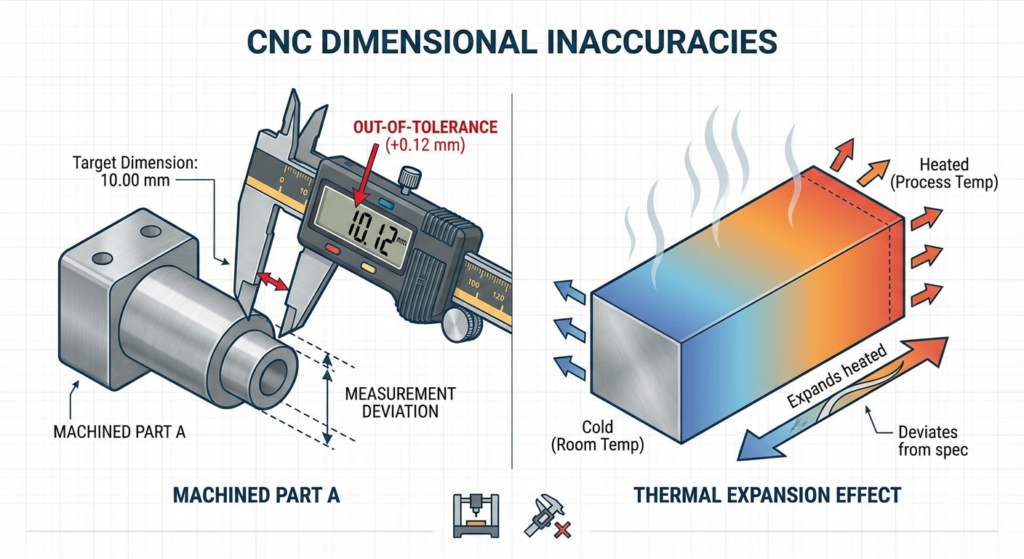
Dimensional inaccuracies are expensive because they often mean scrapped parts or costly rework. A part that's 0.002" out of tolerance might look perfect to the naked eye, but it won't fit into the customer's assembly, and that's where the real cost hits.
Dimensional problems usually develop gradually. A machine might start perfect in the morning, but as hours pass and temperatures fluctuate, parts drift out of tolerance. This is especially true in multi-setup jobs where parts move from one machine to another.
Calibrate and Verify Your Machines Regularly
Implement a preventive maintenance schedule. We suggest checking machine accuracy using precision instruments at least monthly, or before starting any critical jobs. Many modern CNC machines have built-in diagnostic systems—use them. For manual verification, a reliable dial indicator and gauge blocks are your friends.
Account for Thermal Expansion
One of the biggest culprits we see is operators ignoring thermal effects. When your machine, spindle, and cutting tools warm up during operation, everything expands slightly. The material itself also expands as it heats from cutting friction. We recommend:
Implement Setup Verification Procedures
Before running your first part in production, run one at a time and measure it completely. Don't assume your setup is correct because you followed the drawing and work instructions perfectly. Verify with actual measurements. Many of our clients run a single first-piece inspection—it catches setup errors before they become expensive scrap piles.
Use Offset Management Effectively
Modern CNC machines allow tool offset adjustments to compensate for wear and thermal effects. Train your operators to use this feature. If a dimension is running 0.001" high, adjust the offset rather than stopping production. Document these adjustments so you have a record of what's happening during the production run.
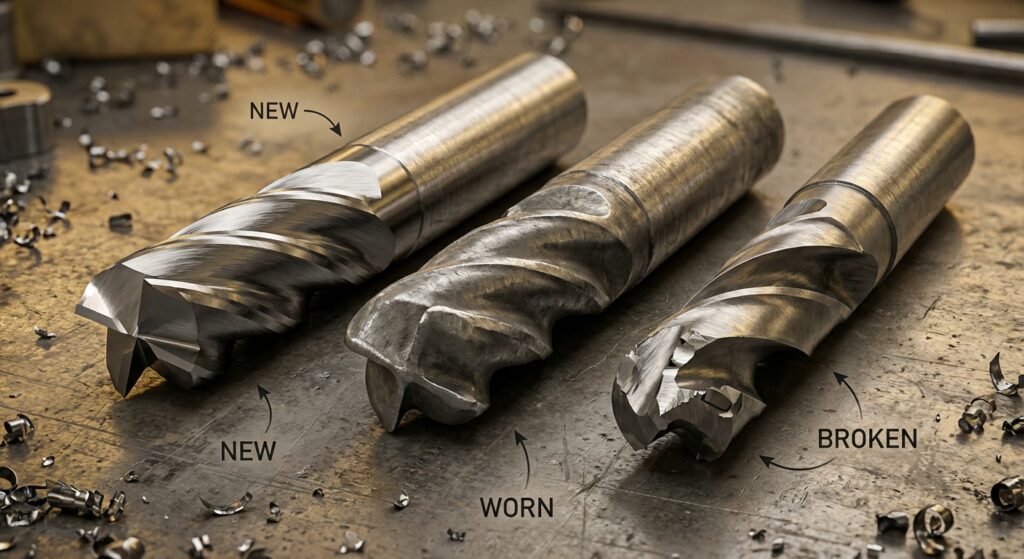
Tool breakage represents lost productivity, scrapped parts, and potential machine damage. We've seen situations where a broken tool doesn't just ruin itself—it damages the part and sometimes the spindle. The primary causes include operating at incorrect speeds and feeds, inadequate coolant supply, built-up edge formation, or hitting something unexpected (like a pocket dimension you missed).
Premature wear, on the other hand, is the slow bleed of your profit margins. A tool that wears out in 30 minutes of cutting instead of two hours is costing you significantly, even if it doesn't break catastrophically.
Use the Correct Tool for the Job
This seems basic, but many shops standardize on a few tool designs and try to use them everywhere. Different materials and operations need different tool geometries. A tool designed for aluminum will wear out quickly in stainless steel. Chat with your tool supplier about the best option for each material you run regularly.
Maintain Consistent Cutting Conditions
Sudden changes in cutting speed or feed create stress on the tool. During a production run, maintain steady, predictable cutting conditions. If your program needs to vary speeds due to different feature types, make sure the transitions are smooth, not jarring.
Optimize Coolant Delivery
A starving tool dies fast. Ensure your coolant system delivers adequate flow directly to the cutting zone. We often see shops with expensive coolant systems that aren't fully optimized for chip evacuation and tool cooling. High-pressure through-spindle cooling can dramatically extend tool life, especially in production runs.
Implement Tool Life Monitoring
Track how long tools actually last on specific materials and operations. Develop a tool life expectancy database. If a tool is consistently lasting half as long as expected, investigate why. Is the speed too high? Is the coolant concentration off? Once you identify the issue, adjust and monitor for improvement.
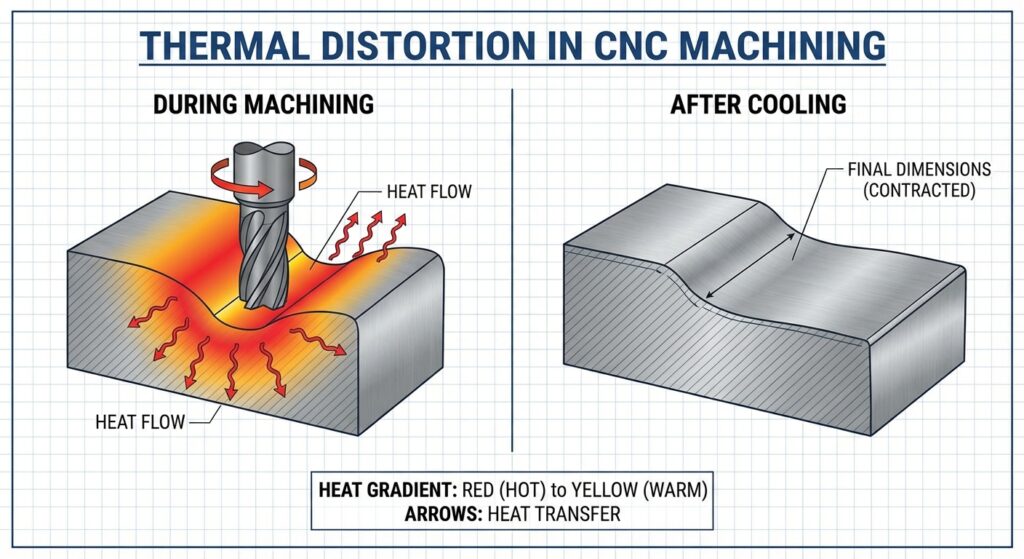
Machining generates significant heat. That aluminum part might experience surface temperatures over 1000°F at the cutting zone, even though you can't feel it with a gloved hand seconds later. This heat transfers to the workpiece, causing expansion. When the part cools after machining, it contracts, and dimensions that were perfect hot are now undersized.
For tight tolerance work, thermal distortion can be the difference between parts that work and parts that don't.
Optimize Your Feeds and Speeds
Lower cutting speeds generate less heat. However, the relationship isn't linear—sometimes very high speeds with light cuts generate less heat than moderate speeds with heavy cuts because the time in contact with the material is shorter. Work with your tool supplier to find the sweet spot for your specific application.
Enhance Cooling Strategy
Flood coolant with high pressure and volume removes heat much more effectively than manual application or air cooling. If you're doing manual machining, use a flooded approach rather than occasional spray. For CNC work, ensure your coolant system is flowing correctly and delivering coolant exactly where the cutting action occurs.
Stress Relief Between Operations
For high-precision work, consider allowing parts to cool to room temperature between machining operations. This prevents compounded thermal distortion. Some shops use a water bath or air-drying time to bring parts to thermal equilibrium before final finishing operations.
Plan Your Machining Sequence
Sometimes you can't prevent distortion, but you can work with it. If you're doing two-sided machining, consider doing the "rough" side first, letting it stabilize, then doing the final precision side. This way, critical dimensions are machined after the major thermal events have passed.
Use Precision Fixtures
For parts prone to thermal distortion, invest in precision fixtures that support the part uniformly and minimize stress concentration. Uneven clamping creates locked-in stresses that magnify when heat is introduced.
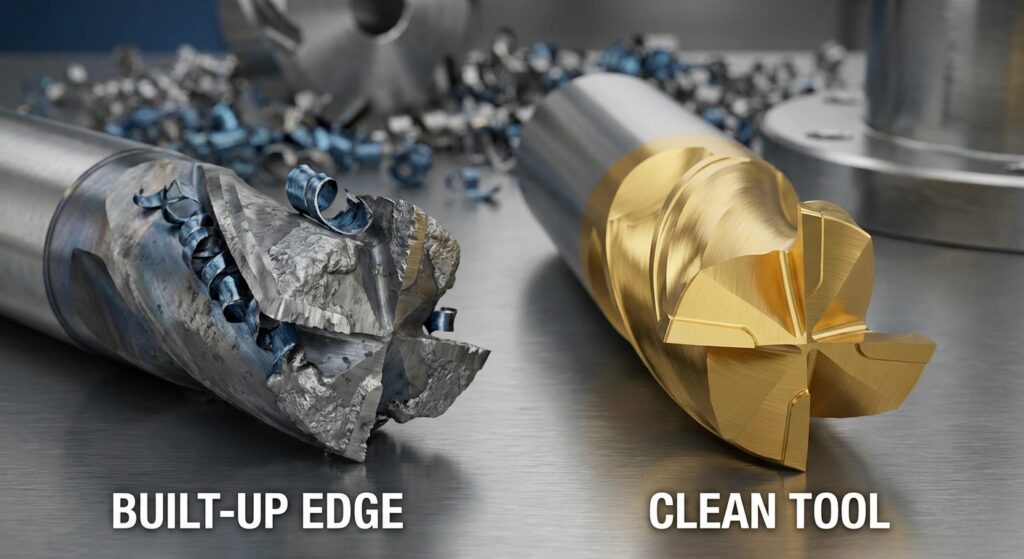
Built-up edge occurs when material being machined welds itself onto the cutting edge of the tool. As more material accumulates, it changes the tool geometry, creating poor surface finish and dimensional problems. Eventually, chunks of the BUE break free, potentially taking pieces of the tool with them.
BUE is particularly problematic with materials like aluminum, copper, and stainless steel—basically, any material that's tough and ductile. It's the leading cause of the "chattering" surface finish we discussed earlier.
Maintain Adequate Cutting Speed
BUE typically forms when cutting speeds are too low for the material. For aluminum, speeds under 400 SFM almost guarantee BUE formation. Check your tool manufacturer's recommendations and stick to them. If you're experiencing BUE, your first adjustment should be increasing speed, not decreasing it.
Use Appropriate Coolant
Some coolant formulations are specifically designed to prevent BUE. Additives that reduce material adhesion to the tool can make a huge difference. Ensure your coolant is at the correct concentration—weak coolant is almost as bad as no coolant.
Tool Coatings Matter
Modern tool coatings like TiN, TiAlN, or ceramic coatings create surfaces where BUE is less likely to form. If you're consistently fighting BUE with a particular tool type, try a coated version. The small extra cost is worth the improved performance.
Take Light Finishing Passes
If your rough machining is creating BUE, a light finishing pass with fresh coolant and optimal speed can clean up the surface and tool geometry. This is better than trying to correct BUE issues in your rough cutting parameters.
Monitor Tool Condition
Regular visual inspection of your tools can catch early BUE formation before it causes problems. If you see a dark metallic buildup on the tool edge, it's time to investigate your cutting conditions or replace the tool.
Understanding these five defects is valuable, but implementation is where the real benefit happens. Here's how we recommend approaching this at your facility:
Walk your shop floor with a critical eye. Which defects are you currently experiencing? Document specific examples—keep photos of problem parts. Track which machines or jobs seem to produce the most issues.
For each machine and common material combination, document the optimal cutting speeds, feeds, tool types, and coolant specifications. Create reference cards that your operators can access easily.
Knowledge is power. Ensure your operators and programmers understand why these standards matter. A team that understands the "why" makes better decisions when unexpected situations arise.
Set up a simple tracking system for defect incidents. When something goes wrong, investigate and document the root cause. Use this information to refine your standards continuously.
Machining defects are frustrating, but they're not inevitable. Through careful attention to cutting parameters, tool management, coolant systems, and machine maintenance, you can virtually eliminate these five common problems from your operation.
At Ruo Chen, we've built our reputation on delivering parts that meet specifications consistently. Much of that success comes from understanding and preventing these defects. We're always happy to discuss how we can help solve your machining challenges—whether through our advanced equipment, experienced team, or consulting services.
The investment in defect prevention pays dividends in improved quality, higher efficiency, and ultimately, better results for your business. Start with one defect category, master it, then move to the next. Before long, you'll have a world-class manufacturing process that your customers will appreciate and your team will be proud of.
Have you experienced any of these defects in your operations? We'd love to hear about your experiences and how you've solved them. Feel free to reach out with your questions or stories.